Thursday, February 19, 2015

The "Costume Look" Dress


Hello again!  I have made the decision on what dress I would like to make first for my 1961 Dress Challenge.  And here it is in all it's glory:


Not a great picture.  It's actually a set with a dress and a three-quarter length sleeve jacket.  It features a fabric-covered belt and the jacket even has fabric-covered buttons.  The skirt is pleated all the way around and has black trim detail around the hem.  Oh the details!  Here is the description from the catalog:

                          The Costume Look, a brief jacket and simple dress, designed with
                          legendary Paris chic.  Handsome textured fabric of rayon enriched
                          with 5 1/2% silk.  Dress zips in back.  Hand wash separately. Shipping
                          weight 1 lb. 10oz. Misses' sizes 10, 12, 14, 16, 18.  Bamboo beige
                          with black belt and band trim...................................................$19.84

Do the math and that price comes out the about $155 today.  I just know I be able to make it for less than that :)

This is a brief post, but I just wanted to check in before I begin sourcing fabric and notions this weekend.  Thanks for reading!


Tuesday, February 17, 2015

Diamond Jubilee Challenge!


 I would like to make a change to the tone and direction of this blog.  I have decided to start a challenge for myself that I will be documenting on this blog.  I hope this will be very exciting and interesting!

Now onto the specifics of the project!  I have long been a collector of vintage Sears Roebuck catalogs (I own catalogs from 1945, 1957, 1959, and 1961 [pictured above]).  I usually find them on eBay or at local thrift stores and I just love looking through them!  (There is no better way, in my opinion, to study the fashion, home decor, and furniture of a year than to look through one of these catalogs. Seriously, depending on the year, a customer cracking open a Sears Roebuck catalog when it was freshly delivered could order almost anything under the sun!)

Here's a look at the Spring-Summer 1961 edition:


Men's casual shirts.


ADORABLE suits for small boys!


Shoes to die for (look at those stiletto heels)!


That modern "Big Square Look" TV!


Even pick up a pooch on credit (only 10% down).


Kenmore metal sewing machines.


I have decided to use my catalog from 1961 from this project. It's the newest (to me), the styles are suitable for warm weather, and I was simply entranced by the pages and pages of beautiful dresses, skirts, and blouses that I wish I could order for myself.  So, I've decided to challenge my sewing skills and create as many garments from this catalog as possible.  The rules are simple:  sew each garment as close as possible to the description and picture shown in the catalog.  I fully expect this to challenge my design and sewing skills, but I also hope to come out of this with a beautiful wardrobe inspired directly by 1961.

I'm excited to get going on this project!  Up next:  Planning my first garment!

Sunday, August 25, 2013

Covering a Sleeve Board

Hi everyone!  Summer is winding down around here and thoughts of fall and winter are dancing in my head.  Some serious sewing (and posts about current projects) is on the horizon and I was recently organizing my sewing supplies in preparation.  I discovered my recently purchased steel sleeve board.  I have no idea when it was made, but I have no doubt that it would be considered "vintage."


I don't know if it's supposed to have a cover, but in my head it was just screaming out for a cheesy looking cover.  So I dug out my cheesiest, quilting cotton I got on clearance at Jo-Ann Fabrics.


I laid out the sleeve board on top of the fabric and traced around it with tailor's chalk.  Then I cut around the outline, being careful to leave about 1 1/2 to 2 inches extra to allow for the cover to fit around the sides of the sleeve board.

I bound the raw edges with vintage lace single fold bias tape from my stash.


 Then I attached thin elastic on the wrong side of cover to really make it "grip" the sleeve board.


 And voila!  Not much, but it does the job.  Now onto the garment sewing!  See you next time!


Sunday, August 18, 2013

Fall Wardrobe Planning

I know it feels like we've just only begun summer, but fall will quickly be upon us.  I can pretty much tell that autumn is imminent when I can't turn around without hearing something about "Back to School" :P.

In any case, I can't get thoughts of lovely fall wardrobe pieces out of my head.  And a recent trip to the fabric store and a perusal of the new Fall 2013 Catalogs left me dizzy with inspiration and itching to start planning for the fall.

M6800

McCall's 6800

First off, I think I'll want a winter coat.  I live in a part of the US that has quite brutal winters with lots and lots of snow, so a nice warm coat is important.  Plus, readers, I've got this kind of "thing" about winter coats:  I just can't get enough of them (wearing them, making them, just plain looking at them!).  McCall's 6800 caught my eye because of the "high-low" hemline and the detachable faux fur collar.  View D even includes a detachable hood.  I'm smitten, guys!  I can imagine making this coat in a thick wool coating with an interlining (for warmth) based on the technique I learned during Gertie's Lady Grey Sew-Along waaay back in 2010.


Simplicity 2154

I am hoping, also, to make Simplicity 2154 this fall.  And in the navy and white houndstooth suiting fabric I acquired at a local thrift store, I think it will look quite "1960s Stewardess" (a look I don't hate :P).  I guess I'll only know if I try it out.


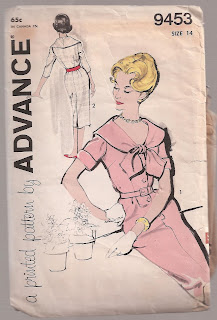
Advance 9453

One of the holes in my wardrobe that I've noticed is a lack of fall/winter work-appropriate dresses.  I hope that Advance 9453 can fix this issue.  It is a fitted dress with a kick pleat that buttons down the front and has the option for short or three-quarter length sleeves.  My best guess is that it dates from the early 1960s.  The bow tie detail on the neckline caught my eye when browsing through my pattern stash.  

I may also feel the need for a few full and fluffy dresses because they're so comfortable and easy to wear at work (and of course, require a poufy crinoline, my favorite!).

Do you have any plans for fall sewing, garment or otherwise?  Please comment below!

Monday, July 29, 2013

July 2013 Thrifting Haul

Just a quick post this morning to wrap up the weekend.  One of my unofficial official hobbies is thrift shopping.  I just love the searching and hunting that goes into thrifting.  Sometimes it takes some digging, but I usually find some great 1950s and 1960s appliances, sewing notions, books, and clothing.  And, to top it all off, I can usually find a GREAT deal!

We have lots of awesome thrifts stores in my town and recently a friend and I spent a day shopping in preparation for her move out of state.  I found some fun fabric and sewing notions (heellllooo sleeve board!) and some great vintage books and magazines.  I'd like to share some of my finds today:

20130728_215718.jpg

Here we have a 1951 Better Homes and Garden Garden Book.  It's bound with a binder-style and has page after page of gorgeous color photos.  There are instructions for lot planning, soil choices, and numerous plants to cultivate (both flowers and vegetables).

Next I found a lovely, wonderful condition 1961 Singer Home Decorations Sewing Book.  Oh my goodness do I love it!  Just flipping through this book, I am so inspired to just completely redo my entire house in a gorgeous early 1960s aesthetic. There also thorough sewing directions for every possible bedspread, tablecloth, or sham you could think of.


Lastly, I found, just sitting on top of a pile of old magazines, three LIFE Magazines.  The large picture of President Kennedy caught my eye and I added them to my "keep" pile.  These three were published right after President Kennedy's assassination:  the first, just one week after, the other two weeks, and the last one was in February of the next year.  On top of the historically interesting and significant articles to read, there are some nice advertisements to drool over.  These LIFE Magazines are probably my favorite finds of this thrifting trip.

Do you have any favorite thrifting finds?  Please comment below!

Sunday, July 28, 2013

For the Love of Presser Feet


A few years ago, in college, I wandered into the school bookstore looking to soothe myself after a tough exam with the purchase of a good book.  Naturally I headed straight for the sewing books and picked up one entitled The Sewing Machine Attachment Handbook by Charlene Phillips (available for purchase here or at your local bookstore).  So many pictures of vintage-y, sew-y things! I just had to have it.  It's so pretty.
Well, the pretty met the practical when I recently acquired a bunch of mystery presser feet for my 1971 Singer Fashion Mate 257.  I ran right for the Handbook and discovered a whole wide world of things my sewing machine can do for me.  It's pretty incredible!  There are presser feet that can shirr for you, hem for you, or even understitch with ease.  Allow me to share my favorites with you (all of this information comes from Charlene's book and my own experience).


The more-than-a-little-intimidating Binder is used to quickly and easily attach bias strips (or purchased bias tape) to the edge of your fabric.  To use it, gently feed the end of your bias strip into the front of the Binder and the shape of the metal "scroll" will manipulate and fold the long edges.  Then, slide the edge of your fabric between the folded ends of the bias strip and sew!  Personally, I don't find myself binding much, but I can see how this could be useful.  Plus it looks really cool!


My other favorite new presser foot to use is the Ruffler.  As you might have guessed, you use this presser foot to create ruffle or gathers and sew over them at the same time.  The screw on top is used to adjust the spacing and size of your ruffles.  Just feed your fabric through and start a-rufflin'.  And, guys, it's pretty amazing just how fast this thing ruffles.  With a little experimenting, you may never have to gather the old-fashioned way again.


A couple other favorites:


The Tucker


The Adjustable Hemmer


The Braiding Foot


The Roller Foot

Do you have a favorite special presser foot?  Comment below!


Tuesday, July 23, 2013

Singer Fashion Mate 257


I recently acquired a new-to-me sewing machine (rounding out a string of used sewing machines given to me by family members simply because they thought I'd enjoy them.  Aren't I spoiled? :P) from my lovely grandparents.  It's a Singer Fashion Mate 257 and as far as I can tell it was manufactured in 1971. It's a heavy, sturdy beast of a thing that has absolutely no trouble zooming over the sometimes absurd number of layers I chose to sew.  I have yet to decide on a name for this beauty.  I am taking suggestions though!

It also came along with the original instruction booklet still in great condition!


Groovy flowers, man!

One of the most interesting parts of the mechanics of the Fashion Mate 257 is the stitch length screw.  It's on the right side of the front of the machine where you might normally find the reverse lever.  To change the stitch length on the Fashion Mate 257, you start by unscrewing the thumb screw until you can freely move it up and down. Select your stitch length (raise it for a shorter stitch length and lower it for long, basting stitches) and hold the thumb screw over your chosen stitch length and slowly tighten the thumb screw until it can't fall any lower.  You're still able to lift the lever up to stitch in reverse, but you retain your choice of stitch length.  Pretty cool, huh?

I got a little snap-happy when I went to photograph this beauty, so please enjoy!


How cute is this logo?  Sometimes I just stare lovingly at it (when I should be sewing!).


Hallmark designed and sold the sewing cabinet to the original owner.  I was simply amazed how the machine "disappeared" into the table and how the cabinet folded up.  Apparently I'm easy to amaze :P.


And, as an added bonus, the new-to-me machine came with a bag full of mystery presser feet.  Some I could identify, and some I could not.  Be on the lookout for a post with the research I've done about these presser feet.


Feel free to comment below with name ideas!

So long!


Friday, April 26, 2013

Bridesmaids Dresses


Butterick 5750


Hi again!  I was recently asked to make the bridesmaids' dresses for a family friend's wedding coming up in September 2013.  With only three bridesmaids and a limited budget, we were able to squeeze out the fabric and supplies for the dresses for about $50 a dress!  (I'm a little proud :P)

The Bride chose a light gold nylon taffeta from Fabric Mart Fabrics with a nice light lining (it's bound to still be hot in September in our neck of the woods).  The Bride was also nice enough to let each girl chose the dress pattern she was most comfortable with.  It presents a few challenges to me (especially since one of the girls lives on the other side of the country and won't be in town until the week of the wedding), but it's also very exciting!

One of the girls chose Butterick 5750 (pictured above).  Once it's made up in the taffeta it should present as formal but still fun.  Across-the-Country-Bridesmaid chose Butterick 5814 (below), one of Gertie's designs and a very stylish pick.  Frankly, I love it and I'm a little jealous I can't make it for myself for the wedding! :P


Butterick 5814

The last girl chose Vogue 8020, View A (below).  I'm super excited to make patterns that I wouldn't choose for myself, but are still pretty awesome!

Vogue 8020

Stay tuned for construction details!


Sunday, September 9, 2012

Corset Muslin Construction


Hello again!  Since we last met our sewing heroes a muslin version of corset View A has been assembled!  For those unfamiliar with garment sewing, a muslin is a practice version of a garment made out of less expensive fabric.  I made this muslin out of very inexpensive muslin from a discount store before I cut into my brocade satin from Fabric Mart Fabrics.

Anywho, using the basting techniques I read about in Claire Shaeffer's Couture Sewing Techniques, I hand assembled the corset pieces.  I knew this would make it much easier to take apart seams for alterations and adjustments.  Additionally, hand basting all the seams is much gentler on the fragile, easy-to-stretch-out-of-shape edges. 

To ensure proper fit (after all, what's the point of going to the trouble of making a muslin unless it represents how the actual garment will fit?) I basted in the boning channels and boning ( both purchased at the lovely Corset Making Supplies.com) onto each seam.  I attached the bra cups using a catch stitch.  Instead of grommets for this practice garment, I put in a zipper.  Here's the finished product:


And here are the guts:


Once finished, I tried it on and found that I needed to add about 2 inches to the back pieces.  I figure that the pattern was designed to allow a little space in the back between the grommets, but I'd prefer less space. 


Unfortunately, now the next step is to rip out all the hard work I've done to put the boning and the bra cups into the final garment.  The real corset will be a brocade satin underlined with a crisp cotton to hide the important stitches. 


I just love the purple flowers!  My sweetie loves it too (or at least he says he does :P)!
 
 
Catch us again next time, same Bat time, same Bat channel!

Monday, September 3, 2012

The Dress.


Many say that the clothes make the man.  Well, I like to think that clothes make the woman too.  In this case it's the dress.  That signature dress that everyone will remember.  Or at least makes someone say "Wow!"

That dress (for a special occasion coming up in October) was destined to be Butterick 4918, a Retro Butterick reprint of a 1952 design.


I'm planning on making View B with the over-the-shoulder wrap.  I absolutely love the gather details on the bodice and the wrap.  At the moment I'm planning on using a beautiful deep blueberry silk taffeta from Fabric Mart Fabrics and underlining it with crisp silk organza.  The envelope art shows the skirt a tad droopy for my taste, don't you think?  A nice poufy crinoline is definitely in order. 


Simplicity 5006 will fit the bill.  View C with the flat waistband and the View A corset will keep things nice and smooth at the waist.

 The corset muslin is currently under construction.  More on that later!